For my next model, I have started by experimenting with various tools from the tool menu, other than the Sphere 3D which I have already used many times, Szpheres which I have used in a previous project (Dobbie) and other than Cylinders which, again, I have already used in modelling Alice my monster girl.
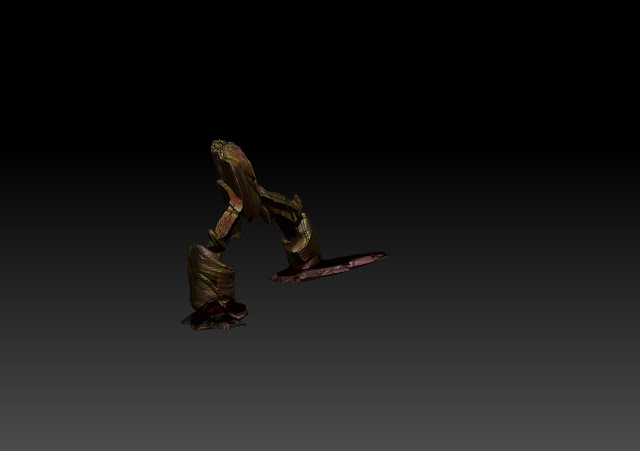
I initially started to do a mask using the Extract tool on the right hand side menu. To do a mask, I have taken a human head from the Lightbox tool menu, and with Ctrl pressed, I have drawn a mask on the face. By pressing Ctrl I was masking part of the face. I have initially started from a very low subdivision of the head (Subdiv 1) and smooth out the top part of the face (especially the eye area), and then increased the division level to 5 and did some more smoothing. In order to smooth, all I needed to do was to press Shift and drag the pen onto the graphics tablet. As soon as the smoothing operation was done and the masking was in place, I have pressed Extract from the right hand Tool menu and it basically extracted the "mask" I have drawn on the face. I have now hidden the layer with the head and worked Solo on the mask. However, once I have extracted the mask, I have played with the various options in the Deformation menu and after partially masking and inflating, flattening, skewing, adding perspective and gravity, I ended up with something that looked like 2 robot legs joined together. this gave me another idea and I started to build on that.
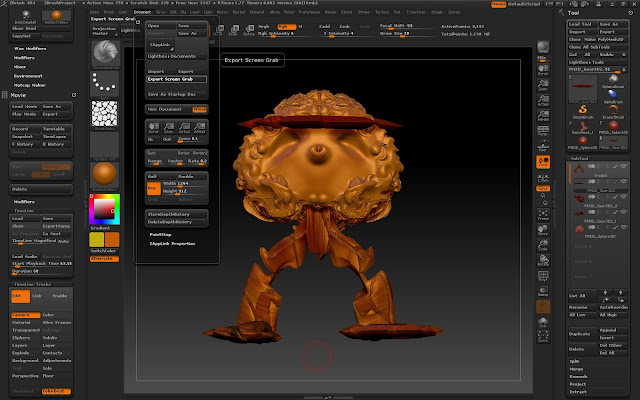
Here we have 2 legs with shoes :) For the shoes I have appended a Gear tool from the Tools menu on the right hand side and again, experimented with the options in Deformation pushing the sides in and making it into an oblong shape ( by using Taper, Squeeze and Bend in the Deformation Tool).I tried then pulling a heel out, but it didn't work, I'm guessing because of the metallic structure of it. So in order to get the bottom of the "shoe" straight, I have masked part of the shoe (by pressing Ctrl and colouring the part that I intended to protect) and then by selecting Clip Curve Brush, I have cut slices of the bottom of the shoe until it became more or less straight. I have then duplicated the layer in order to create the second shoe and by using Rotate from the Deformation Tool menu, I have placed the second shoe on the other foot.
In this screen shot, I have got another Gear 3D around the waist of my model, but I have then decided against using it in that position.
I have then appended a Sphere 3D for the head, from the Tool menu on the right hand side. I have distorted it by using the Move Elastic brush and increasing the draw size for the brush. After the overall shape was done, I have used GroomSpinKnot brush from the brush palette to give it the texture of "hair" and that's how I have also built the nose (by simply twisting and puling the pen onto the graphics tablet). With Clay buildup brush and Alt pressed, I have scooped out the eye sockets. I have also changed the material for the head to Reflect Yellow which gave me the golden statuesque look .
I have now moved the Gear 3D from the waist line to the top of the head by selecting Move in the Deformation menu on the right, or by simply clicking on Move on the menu above the canvas and then dragging the middle circle. I have now created some sort of head gear. And... Zbrush crushed and closed down before I got a chance to save my model. I managed to save it in JPG format, but the last ZTL file saved was the first one with just legs and shoes...
So here I go again, this time a bit quicker. Same steps to create the head. I spent more time here modelling the nose, purely because I have enjoyed creating a human nose :) With the Rake Brush I have created some lines on the face above the eyes.
I have appended another Gear3D1 and used it as for the eye by using Move and Scale from the menu above the canvas. I have then duplicated this layer with the eye and rotated for the other eye socket. In order to colour the eyes red, I have selected RGB and chose Red from the colour palette and by using free hand brush, I have painted the "eye"red.
I have worked on the eyes Solo and coloured them in red, while giving the eye sockets a black underneath, to recreate an iris. In order to colour the eye sockets, I have worked Solo on the head and by using free hand brush and with the RGB selected, I have chosen black from the colour palette and coloured the eye sockets in black. After making the eye layers visible again, my model looked more realistic.
I have appended an Arrow3D1 and played with Move Elastic and Clay buildup brushes to create his left arm.
I have appended a Cylinder3D1 afterwards for his right arm. I have reduced it in size considerably and again, played with the deformation options (Bend, Twist) to create an arm shaped object. I'm quite happy with the way the two arms came out. For this sort of model, I couldn't have duplicated or mirrored the arms as the model is standing in a bent position, so the arms should be quite different from each other when it comes to positioning
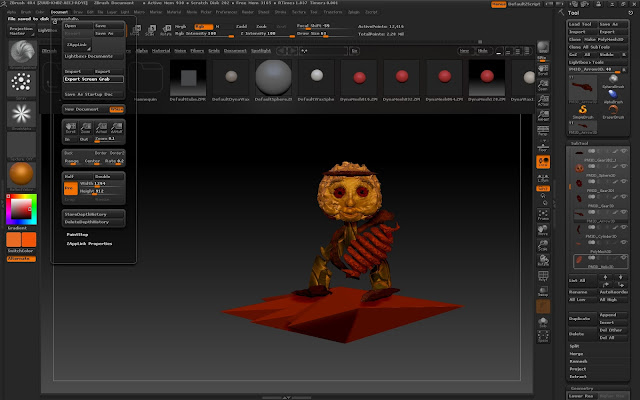
For the last stage I have appended a star (Polimesh3D1) for the base which I have deformed again, with Skew, and flattened it by cutting slices off the top and bottom with Clip Curve brush after masking the middle area. So now my Frogbot is on a start shaped stage. The character itself it futuristic and that's why I went for that sort of stage. From the previous step it was clear to me that my character was a musician of some sort from the position of the legs, and then of the arms. He needed an instrument of some sort in his hands, but again, it needed to be futuristic.
The last tool I have appended it was a Helix3D1 for the "musical instrument" which I have coloured in red selecting RGB and chosing red in the colour palette.
For this project, I have used most of the tools in the pallet, and thoroughly enjoyed creating my Frogbot. (the name comes from his flat froglike feet)


No comments:
Post a Comment